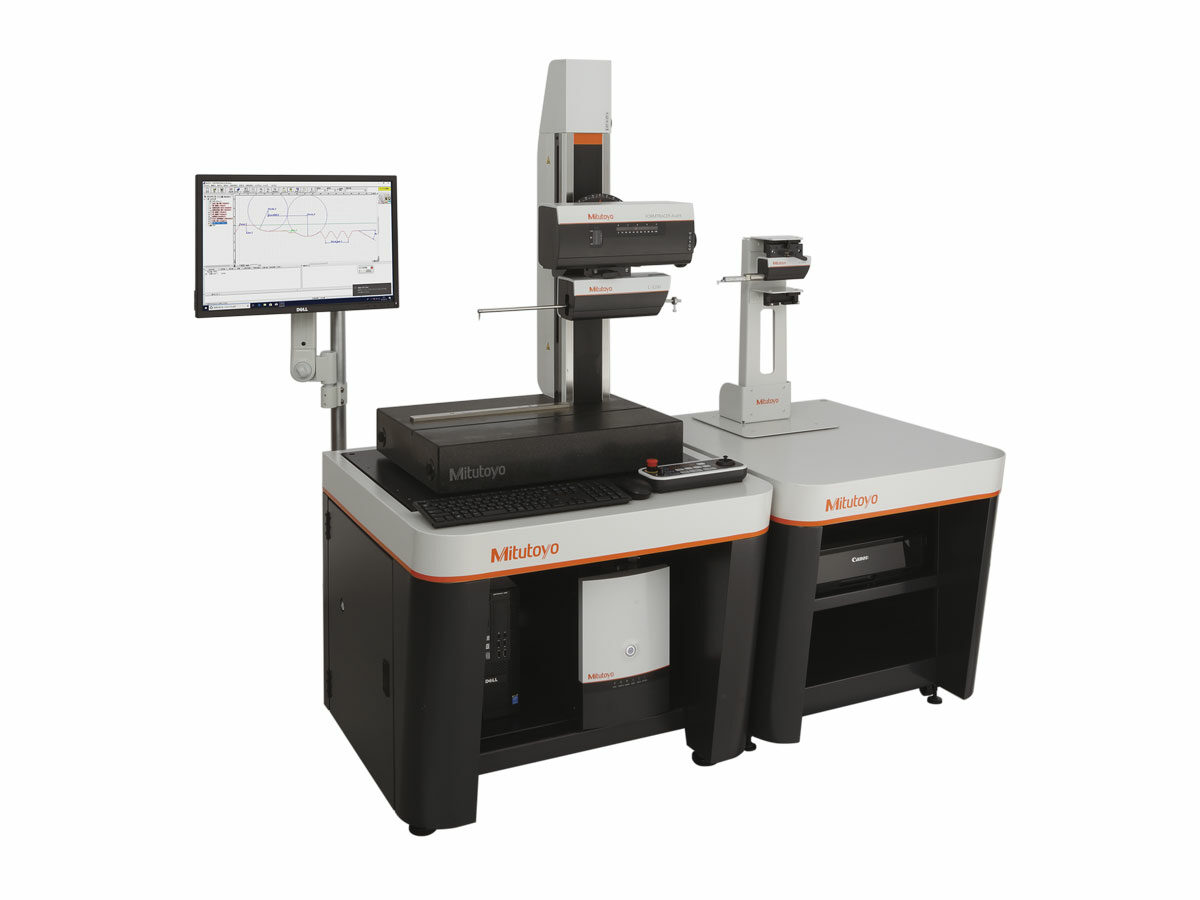
The Formtracer Avant D3000 is capable of making both contour and surface roughness measurements. The two detector heads are easily switched out without turning off the machine. The FTA-D3000 model features a single-sided stylus that is capable of measuring ID and calculate pitch diameters.
- Hot swapping allows switching between the contour detector and roughness detector without powering the machine off
- The tool-less replacement mechanism uses a thumb-turn clamp for much faster switching between detectors
- Stylus drop detection feature detects any sudden drop of the stylus and stops the measurement operation
- Collision monitoring for the magnet arm and detector cover ensures safe measurements even during high-speed movements
- Optional accessories for automatic measurement automate processes from the setup to the measurement
| Order No.: | Product Image: | Range X-Axis: | Column vertical travel: | Granite base: | Main Unit Dimensions: | Main Unit Mass: | |
|---|
| 525-311-13 | — | 4″ / 100mm | 11.8″ / 300mm | 23.6×17.7″ / 600x450mm | 38.2×22.6×38″/ 970x574x966mm | 308lbs / 140kg |
| 525-312-13 | — | 4″ / 100mm | 19.7″ / 500mm | 23.6×17.7″ / 600x450mm | 38.2×22.6×45.9″/ 970x574x1166mm | 330lbs / 150kg |
| 525-313-13 | — | 4″ / 100mm | 19.7″ / 500mm | 39.4×17.7″ / 1000x450mm | 53.9×22.6xx46.3″/ 1369x574x1176mm | 485lbs / 220kg |
| 525-314-13 | — | 4″ / 100mm | 27.6″ / 700mm | 39.4×17.7″ / 1000x450mm | 53.9×22.6×56.3″/ 1369x574x1430mm | 595lbs / 270kg |
| 525-316-13 | — | 8″ / 200mm | 11.8″ / 300mm | 23.6×17.7″ / 600x450mm | 38.6×22.6×38″/ 980x574x966mm | 308lbs / 140kg |
| 525-317-13 | — | 8″ / 200mm | 19.7″ / 500mm | 23.6×17.7″ / 600x450mm | 38.6×22.6×45.9″/ 980x574x1166mm | 330lbs / 150kg |
| 525-318-13 | — | 8″ / 200mm | 19.7″ / 500mm | 39.4×17.7″ / 1000x450mm | 54.3×22.6×46.3″/ 1379x574x1176mm | 485lbs / 220kg |
| 525-319-13 | — | 8″ / 200mm | 27.6″ / 700mm | 39.4×17.7″ / 1000x450mm | 54.3×22.6×56.3″/ 1379x574x1430mm | 595lbs / 270kg |
| 525-311-13 |
| 525-312-13 |
| 525-313-13 |
| 525-314-13 |
| 525-316-13 |
| 525-317-13 |
| 525-318-13 |
| 525-319-13 |
Технические характеристики
| Resolution X-Axis: | 1.97μin / .05μm |
|---|
| Measuring Method: | Ultra high precision linear encoder |
|---|
| Drive speed (software): | 0 — 3.1in/s / 0 — 80mm/s |
|---|
| Drive speed (joystick): | 0 — 1.57in/s / 0 — 40mm/s |
|---|
| Measuring Speed: | .00078 — 1.18 in/s / .02 — 30 mm/s |
|---|
| Measuring direction (Surface): | Backward |
|---|
| Detector Z-Range (Surface): | 320, 3200, 32000μin / 8, 80, 800μm |
|---|
| Detector Z-resolution (Surface): | .004, .04, .4μin / .0001, .001, .01μin |
|---|
| Detection Method (Surface): | Differential inductance |
|---|
| Skid Radius of Curvature: | 1.57′ |
|---|
| Measuring Force (Surface): | 0.75mN |
|---|
| Stylus tip (Diamond, angle °/ tip radius) (Surface): | 60/2μm |
|---|
| X-axis inclination angle: | ±45° |
|---|
| Z1-Axis Detector Measuring Range (Contour): | 2.4′ / 60mm |
|---|
| Z1-Axis Detector Measuring Method (Contour): | RT detector |
|---|
| Z1-Axis Detector Resolution (Contour): | 1.57μin / .04μm |
|---|
| Measuring Direction (Contour): | Forward/Backward |
|---|
| Measuring Force (Contour): | 30mN |
|---|
| Stylus tip (Diamond, angle °/ tip radius) (Contour): | 12°/ 1000μin / 12°/ 25μm |
|---|
| Column resolution: | 39.4μin |
|---|
| Column Resolution: | 1μm |
|---|
| Z2-axis Measuring Method: | ABS linear encoder |
|---|
| Column Z2-axis drive speed (Software): | 0 — 1.2in/s / 0 — 30mm/s |
|---|
| Z2-axis drive speed (manual joystick): | 0 — 1.2in/s / 0 — 30mm/s |
|---|

